Managing Envy Libraries The first panel you see is Manage Envy Libraries: Manage Envy Libraries Panel In the above panel, Environments has three known library server names: • The first line identifies the File I/O library access. Only one development environment can be connected to a File I/O-based library at a time. • ‘192.168.10.10’ identifies the server address of a machine which is running the library server program EMSRV which allows many development images to access and share a library. • ‘build’ identifies the name of a server machine which is converted to an IP address using standard Domain Name Server (DNS) lookup 
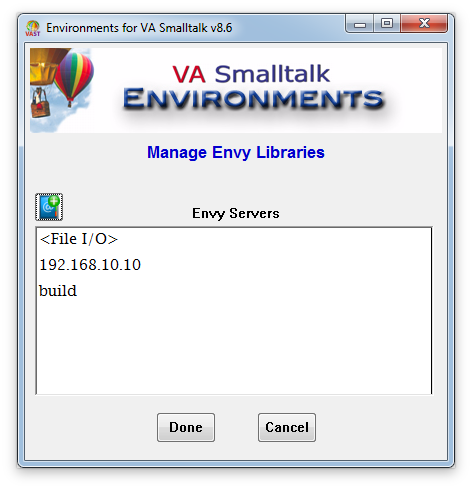
You can register a new Envy server name/address from this panel by pressing the button above the Envy Servers list. When you select an Envy Server name, a row of buttons are displayed on the line which provides access to the operations you can perform on the Envy Server name/address: Manage Envy Libraries Panel: with an Envy Server Name Selected Click the Edit Server Name button to add/remove specific library paths from the Envy Servers list, or to rename the server. Press the button to delete the selected Envy Server Name, and any library paths it defines, from the system. 
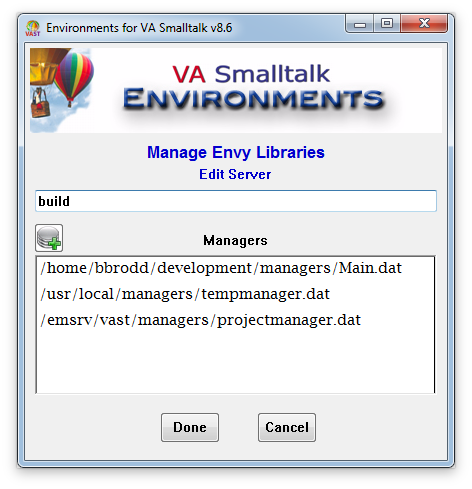
To add a new Envy Server Name to the system, press the button. You can specify the Envy Server Name as either a network name or a dotted IP address. You will get a new panel to provide specifics. Clicking on Done or Cancel closes the panel and returns you to the System Settings panel. Adding and Editing Envy Libraries When creating a new Envy Server Name, or modifying an existing one, you will see the following panel: Manage Envy Libraries-Edit Server Panel In the panel above, ‘build’ is the host of EMSRV, and has three library names. As with the previous list panels, when you select a library name, a row of buttons is displayed on the line which provides access to the operations you can perform on the library name. You can change the path and file name of a particular library name by selecting it and then pressing the button or delete the selected library name entirely by pressing the button. Clicking either Done or Cancel brings you back to the “Manage Envy Libraries’’ list panel.