Creating a subclass
Begin by creating a class component:
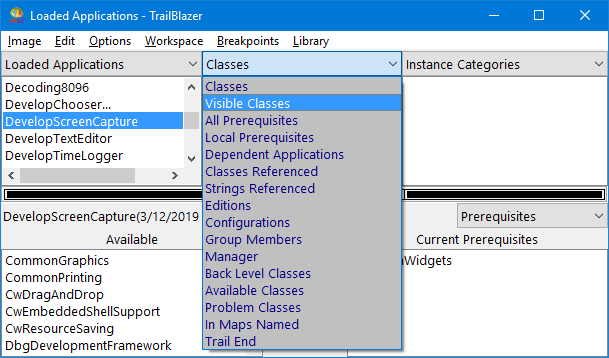
1. From a TrailBlazer browser named Loaded Applications with DevelopScreenCapture selected in the list of applications, select the down arrow to the right of the pane title Classes.
2. From the displayed drop-down menu, select Visible Classes.


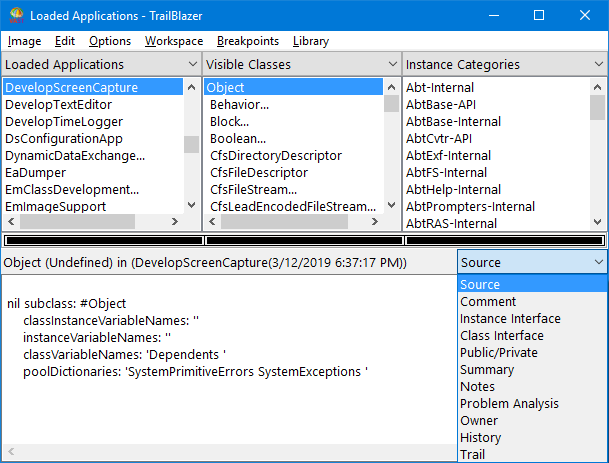
3. From the list of visible classes now displayed (upper middle pane), select Object. The class you are defining will subclass from this class.
Note that after you selected Object the lower half of the browser changed. It now displays the class definition--or source code--for Object in a description pane. You can change the display in this pane by selecting one of the options listed in the drop-down menu just above the pane.
The following graphic shows the available options:


To continue with the example, keep the Source display.
4. Position your mouse over the list of visible classes; then press a mouse button to pop up a menu.
5. From the displayed list of menu options for classes, select Add > Subclass Of Visible Class.
6. From the displayed list of visible classes, select Object.
7. Type a class name for the screen capture tool in the displayed prompter. If you are using OS/2, type ScreenPMCapture. If you are using Windows, type ScreenWinCapture.
Though you can name the class anything you want, using one of these class names makes it easier to complete examples in Defining lineups for multiple platforms. The examples in that chapter use ScreenPMCapture and ScreenWinCapture in platform-specific lineups.
8. Click on OK. A window opens, listing available subclass types.
9. Select subclass; then OK.
The name of the class is shown highlighted in the list of classes and its definition is shown in the description pane.
Last modified date: 03/13/2019