Creating an application component for DevelopScreenCapture
To create the application DevelopScreenCapture:
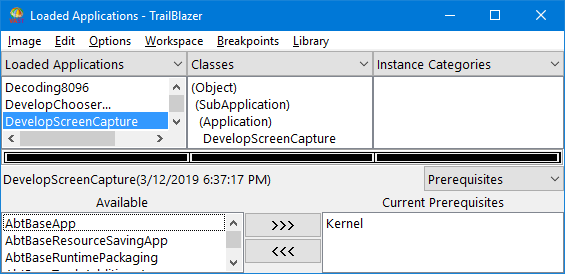
1. If you have not done so already, load the feature TrailBlazer. Then, with the Tools toggle Use TrailBlazer Browsers set, open a TrailBlazer browser on applications by selecting Browse Applications from the Tools menu. Upon opening, the title bar and the upper left pane title display Loaded Applications. This browser is comparable to a standard Applications Browser.

When the title bar and pane title display something else, such as Loaded Classes, you can change to the Loaded Applications display by clicking on the down arrow to the right of the pane and then selecting Loaded Applications from the drop-down list. Thus, you change from a "Classes Browser" to an "Applications Browser" using the upper-left drop-down list. You can also change the display by clicking on the left side of the navigation bar.
To open a second browser, use options available in the Image menu. Thus, to open a second Loaded Applications browser, select Browse > Loaded Applications from the Image menu.
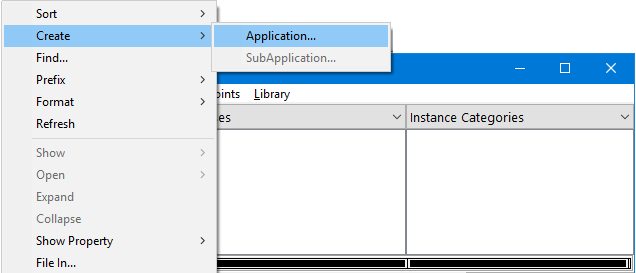
2. With your mouse positioned over the list of applications (upper left pane), press mouse button two. A pop-up menu displays of actions available for applications.
3. From the menu, select Create > Application.


4. In the displayed prompter, type DevelopScreenCapture; then select OK.
Note that several changes take place in the browser. The application name appears in the list of applications. The initial classes for DevelopScreenCapture are listed in the upper middle pane named Classes. And the default prerequisite application, Kernel, is listed in the lower right pane named Current Prerequisites.


Last modified date: 05/19/2020