Creating reusable report forms
You can build Report Forms as reusable parts to be embedded in other reports. Reusable report forms can help you reduce the number of connections in your report parts, reuse commonly used reporting fields, and produce standard report parts, like letterhead.
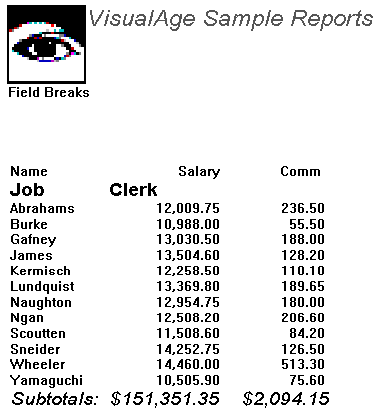
The following example shows you how to create a reusable header for a report. This example leads you through the process of replacing the header in the field breaks example with a standard, reusable form. It explains how to create a reusable form, add fields to it, create a variable that will be used for the title of the report in which the form is embedded, and embed the form in a report. When you finish, the field breaks sample report will look similar to the following:


Creating the report form
To create a report form, follow these steps:
1. Create a new report part from the Organizer.
2. Delete the Report Shell from the free-form surface of the Composition Editor.
3. From the Reports category of the parts palette, select a Report Form part and drop it on the free-form surface of the Composition Editor.
Adding fields to the form
To add graphic and text fields to the form, follow these steps:
1. To add a graphic to the form, select the Report Image Field part and drop it on the Report Line in the form.
2. Open the settings of the Report Image Field part and make the following selections:
a. For graphicsDescriptor, select Image. Use the Browse button to search for a bitmap to include in the form.
b. For unitTypeSelected, select Inches, set x to 0, and set the height and width of the image to 1.
c. For sizeEffects, select size image to field.
3. To widen the report form, select it and then drag the selection handles.

If you need to set the form to an exact width, do the following:
a. Drop a report shell on the free-form surface.
b. Move the reusable report form to the body of the report shell.
c. Drag the selection handles of the report form to size it to match the size of the report body in the shell.
d. Move the form back to the Free-form surface and delete the report shell.
4. To add a text field to the form, select the Report Text Field part and drop it on the Report Line to the right of the image.
5. Open the settings of the Report Text Field part and make the following selections:
a. Set the object property to VA Smalltalk Sample Reports.
b. Set the unit type to Inches and set x to 1.
c. Open the font selection window and select a typeface, weight, and size.
d. Change the foregroundColor property to a different color.
6. To widen the text field, select it and then drag the selection handles until the field fills the remaining width of the report line.
7. To add another text field to the form, select the Report Line part and drop it on the Report Form below the image.
8. Open the settings of the default Report Text Field part and select a value for x, font, and color, but do not enter any text for the part.
9. Resize this field to fill the entire report line.
Adding a variable
The text on the line you just added will be filled in with the title of the report in which the form is reused. To add a variable for the report title, follow these steps:
1. To create a variable for the report title, select the Variable part from the Models category and drop the variable on the free-form surface.
2. From the variable part's pop-up menu, select Change Type and in the window that displays, type String.
3. Change the name of the variable part by selecting Change Name from its pop-up menu and typing ReportTitle in the window that displays.
4. To make the variable visible to the report in which you embed the form, select Promote Part Feature from the variable's pop-up menu, and then select self from the list of attributes.
5. Connect the self attribute of the variable part to theobject attribute of the Report Text Field in the second line of the form.
Notice that the default text changes to self].
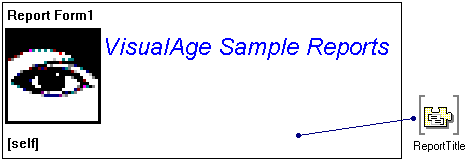
Your report form is complete. It should look similar to the following in the Composition Editor.
6. Save the part and close the Composition Editor.

Reusing the form
To add the reusable report form to a report, follow these steps:
1. Open a Composition Editor on the field break example you created earlier in this chapter.
2. Delete the date, title, and time fields from the report header.
3. Open the settings for the Report Shell and increase the top margin of the report to 2.25 inches.
4. From the Options menu of the Composition Editor, select Add Part; then in the window that displays, type the name of your reusable report form in the Class name field and make sure the part type is Part.
5. Drop the form onto the header of your report.
6. Now connect the reportTitle attribute of the reusable form to the title attribute of the report shell.
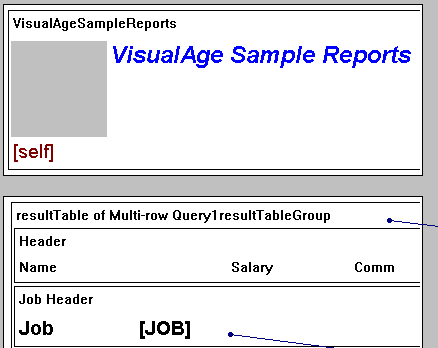
The header of the report should look similar to the following.


Now when you test your report, it should look like the illustration at the beginning of this section.
Last modified date: 05/18/2020