VA Smalltalk parts
Making connections to a Domino or Notes data source using parts is even more convenient. The classes give you more control, but the parts will connect easily to any server that is reachable from your workstation. You will need to familiarize yourself with the following terms that are described below: access set, Domino Connection specification, and Domino Connection alias.
Domino access set (AbtNotesAccessSet)
Domino Connection saves objects that specify the connection to a certain Domino application or Notes database (so called connections specifications) in an access set. An access set is a class which is associated with your application, much like the classes that define your visual and non-visual parts. An access set can hold one or many connection specifications. When you create a new application, you will be prompted automatically when it is necessary to create an access set.
Domino Connection specification
A Domino Connection specification is designed to grant access to a particular database. It is composed of a database name, a server specification, and some additional attributes that help you tailor custom behavior. To find out about connection specifications in your system first try to open the connection specification window which is available from the Options menu in the Organizer window.
Note:
If you do not find the menu entry, your Domino Connection is not installed correctly. Refer to the installation notes for proper installation instructions.
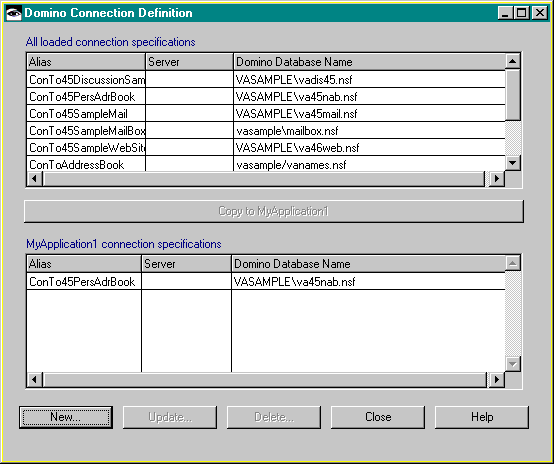
Click on Domino Connection to open the connection specification overview. Your result should look something like this:
Note:
If you open the connection specification window for the first time, there might be no entries in the listboxes. Load the Domino Connection sample application to find at least four predefined connection specifications.If you find an empty list, here is a step-by-step procedure to create your own connection spec:
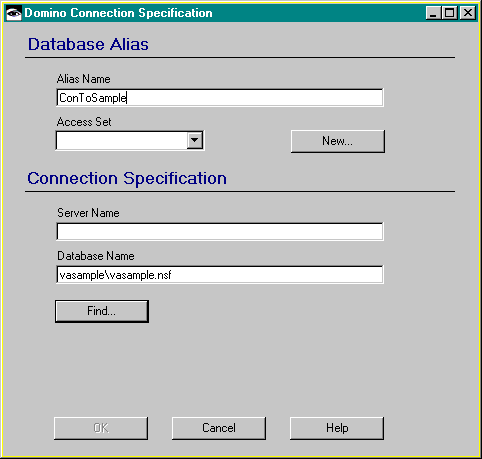
a. Select New to open the Domino Connection Definition window.
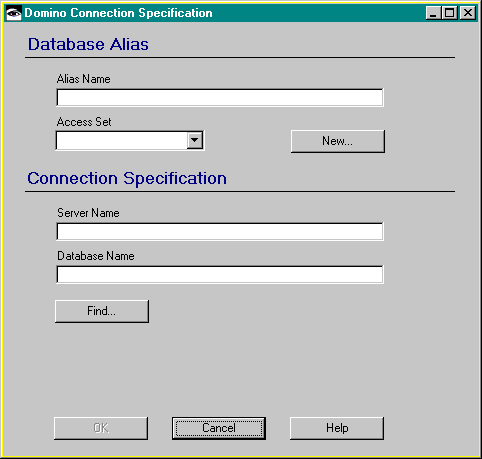
b. If you open the connection specification window for the first time in the current application, you will be prompted for an access set name. Remember that access sets are classes and choose a capitalized first letter for the name of your access set. Next specify a server name and a database name in the appropriate fields in the connection specification window.
Note:
If you are not sure about your Domino servers name, you should ask your Domino administrator. You also can specify local in the server name field to define access to databases on your workstation. There are two ways to specify a database path:
•If your database is on your workstation, you can either specify a path relative to your data directory (find the definition of the data directory in your notes.ini, keyword (DIRECTORY) or you can specify a full operating system path including drive letter for databases outside your data directory.
•If your database is located on a server, you can only specify a path which is resolved relative to the server's data directory.
For the following examples, you will work with one of the sample databases which come with VA Smalltalk Domino Connection. If you have copied them into your local data directory (which was suggested in the post installation procedure), you must type in the name of the database and specify an entry for the server.
There is an even more convenient way to define the essentials of a connection specification: use the Find button to open the Domino directory view. Depending on your system setup you might find a variety of first level category entries in the browser or you might just find a single entry saying: local, if you are not connected to a server.
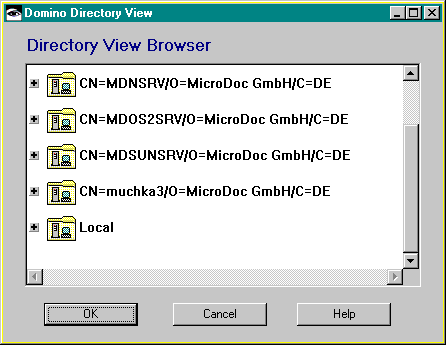
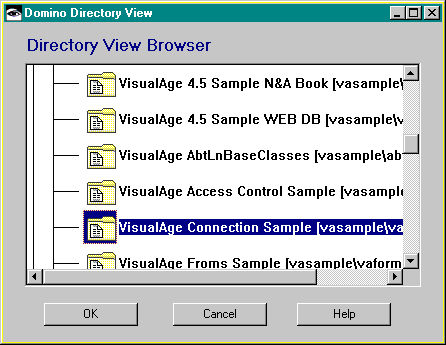
c. Click on the [+] icon left of the local workstation icon to expand the default directory tree. Select the vasample directory icon and expand it. Now select the vasample.nsf database and press OK.
Note:
The display format in the database browser is as follows: A computer icon is displayed for a server, a folder icon represents a directory entry and a notebook stands for a database. Directory names are displayed in [ ] brackets, database information is composed of the database title, and the database name in ] brackets.
d. Now return to the new connection specification window. You are ready to specify a connection alias. A connection alias is a symbolic name that is used in all Domino Connection parts to reference a particular database connection. Name your sample connection ConToSample.
Note:
You can set up an application using a connection alias for development referencing a temporary database. When you want to deploy the application, you can change the connection alias to let your application operate on different database, even on a different server. Be aware that changing a connection alias for a prefabricated application can cause problems if the newly selected database has structural differences compared to the old one. (It is similar to copying view and form definitions from one Domino database to another. They will only work if there are corresponding field definition and documents in that database).
e. Now select an access set from the appropriate dropdown list in which the newly created connection specification will be stored. . You might use the access set that was created when you opened the connection specification window for the first time or you can create another access set using the New button.
Copying connection specification from other application
If you have loaded several applications that define connection specifications, you might want to use one of those already defined. Select the connection specification you want to copy from the upper listbox and press the Copy to application button. The spec is copied to the lower listbox and is available for future use in your application.
Note:
The Copy to button is showing the name of the applications that is selected in the Organizer and thus looks different depending on what application you are working on.
Last modified date: 06/22/2018