Displaying rows as strings
In this example, you will learn how to display all the result rows as strings in a list box.
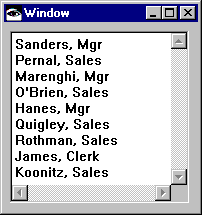
When you have finished, you will have a window that looks like this:


User Interface
1. Begin by creating a new visual part with a list box in the window.
2. Add a multi-row query to the free-form surface, and use the same SQL query you used in the last example:
SELECT STAFF.NAME, STAFF.COMM, STAFF.DEPT, STAFF.ID,
STAFF.JOB, STAFF.SALARY, STAFF.YEARS
FROM STAFF
3. Tear off the resultTable attribute from the multi-row query.
4. Connect the window's openedWidget event to the query's executeQuery action and connect the rowsAsStrings attribute of the result table to the items attribute of the list box.
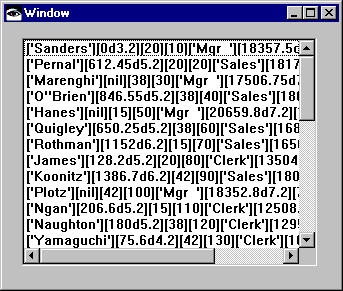
5. When you test the visual part, it appears as follows:

Notice that all of the columns are concatenated, but separated by left and right brackets. Since this probably isn't the appearance you want, you can write a script that formats the results more neatly by concatenating the name and job columns and displaying just those columns in the list.
To create this script and add it to your visual part, follow these steps:
1. Switch to the Script Editor and create the following script:
2. formatRows
| items address rows |
items := OrderedCollection new.
((self subpartNamed: 'resultTable of Multi-row Query1')
valueOfAttributeNamed: #rows selector: #'IS_rows')
do: [:each |
each isNil ifFalse: [
address := (each at: 'NAME') trimBlanks,
', ', (each at: 'JOB').
items add: address.]].
^items
For each row of the result table, this script concatenates the name and job values, separated by a comma. As it iterates through the rows, each of these strings is added to an ordered collection, which is returned at the end of the script.
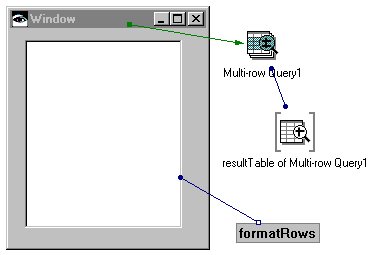
3. To display this collection of strings in the list box, change your connections as follows:
a. Delete the connection between the items attribute of the list box and the rowsAsStrings attribute of the result table.
b. Add an attribute-to-script connection from the items attribute of the list to the formatRows script.
c. On the connection dialog, select the More dependencies push button.
d. Select the result table part and the self attribute, and select Add row. This makes the script run whenever the result table changes.
e. Select the OK push button on the connection dialogs to return to the Composition Editor.
Your connections should look like the following:


4. Test your work, and you should see the name and job strings displayed neatly in the list.
Last modified date: 06/01/2018